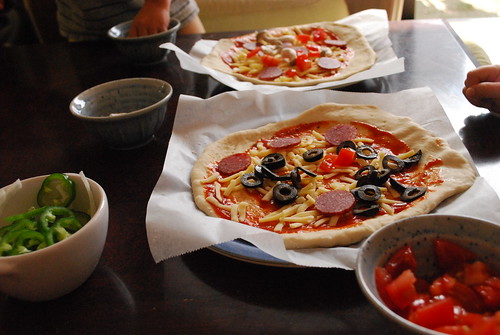
Here are two pizzas ready for the oven! The one in the foreground is my daughter's, the one in back is my eldest son's. To get them to help out, I prepared all the toppings and then moved everything to the kotatsu (sadly, my kitchen is so small so my kids can't help me in there). It was a bit of a challenge to keep the baby out of everything, but the two older kids had fun.
I used my bread maker to make the dough. There is a 'pizza' option on the menu, and will prepare the dough up to the first rising. Then, you take it out, punch it down and divide it in two, then put it in a warm place to rise again (about 20 minutes). All in all, it takes about an hour and a half from mixing to finishing a pizza (though I let it cool down for about 7 minutes before I cut it). That's the first pizza, the second will take twenty more minutes to bake (darn small oven!)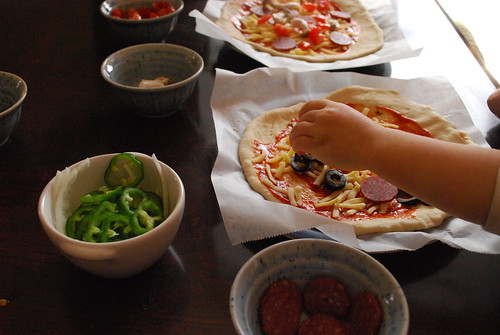
Pizza dough in breadmaker (National SD-BM101):
280 grams flour
15 grams butter
1 Tbsp. sugar
1 tsp. salt
180 mL water
Dump dry ingredients into the breadmaker 'pot' (make sure the paddle is in it--properly hooked up--or you'll just have warm goop in there after 45 minutes *blush*) making a kind of hill in the middle. Pour the water around the sides, making an island out of the hill. Put the pot into the bread maker and make sure it's fitted properly inside. Close the lid, then lift the smaller lid and add:
1 tsp. dry yeast
in the yeast compartment. Close the smaller lid, press the 'menu' button, select the 'pizza' option and push start. (I hope you know these for yourself on the bread machine. If not, check out jojoebi's helpful picture on flickr.)
When the dough is finished, take it out and be careful to take out the little paddle. You don't want to find that in your dough when you go to roll it out! Divide the dough into two equal portions then allow it to rise again, in a warm place, for twenty minutes. After rising, roll the dough out in whatever pizza shape you want, pierce the dough with a fork, then put on whatever toppings you like. Bake for about 20 minutes at an over temperature between 180 and 200 C (I use 190). Yum
(I know this recipe is specifically for the bread machine. Sorry about that. But *if* you are in the market for a bread maker, and *if* you live in Japan, I cannot recommend this one enough. There is a smaller, slightly less expensive machine by National that doesn't make pasta/soba/udon dough and mochi, but if you think you want to try making either of those, then be sure to get this machine. It has a timer you know, fresh baked bread in the morning when you get up!!)
For pizza sauce, I guess my taste buds have finally become 'Japanized' because I don't mind the 'cheap' stuff from AEON (generic brand no less). When I first came to Japan I couldn't stand Japanese pizza sauce and usually had to put lots and lots of tabasco on it just to make it appetizing. Now I find it's not too bad. Ha!
As for the toppings, I get the dry salami (or at least, it looks like dry salami) in the supermarket. For some reason a lot of them are called 'Light Karen' but I'll try not to read anything into that. I like piman and onion on my pizza, but the kids do not. That's why having two (small) pizzas is great, because I make a 'pepperoni' and tomato pizza (one half olive) for the kids and a kind of 'combo' for my husband and me. It works out well. For the cheese, I usually get the shredded cheese at Costco (with mozzarella) but even the packs sold at the supermarket work well.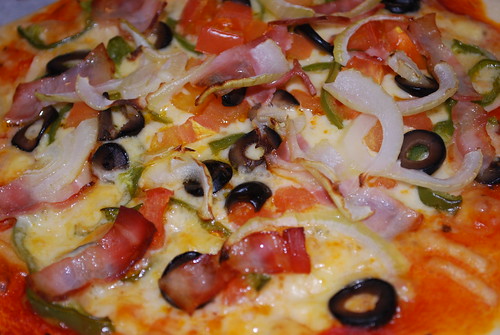
Over the weekend I used some whole wheat flour (100 grams) and though it wouldn't roll out to a very big shape, it was delicious!
Monday, February 23, 2009
Makin' pizza
![]()
Subscribe to:
Post Comments (Atom)

1 comments:
So glad to see you adding posts to your cooking blog! The pizza looks divine!! Are you interested in joining a baking group with us gals?
Post a Comment